
Once you've issued an NFT on Avacus, minting it lets you distribute it to friends and your community — or even to yourself — allowing you to actually own it for the first time. The issuance steps required before minting are covered in a separate article.
Related article: Issuing an NFT
How to Mint an NFT
First, make sure the network shown at the top of your home screen matches the network your NFT was issued on (e.g., Polygon, Ethereum).
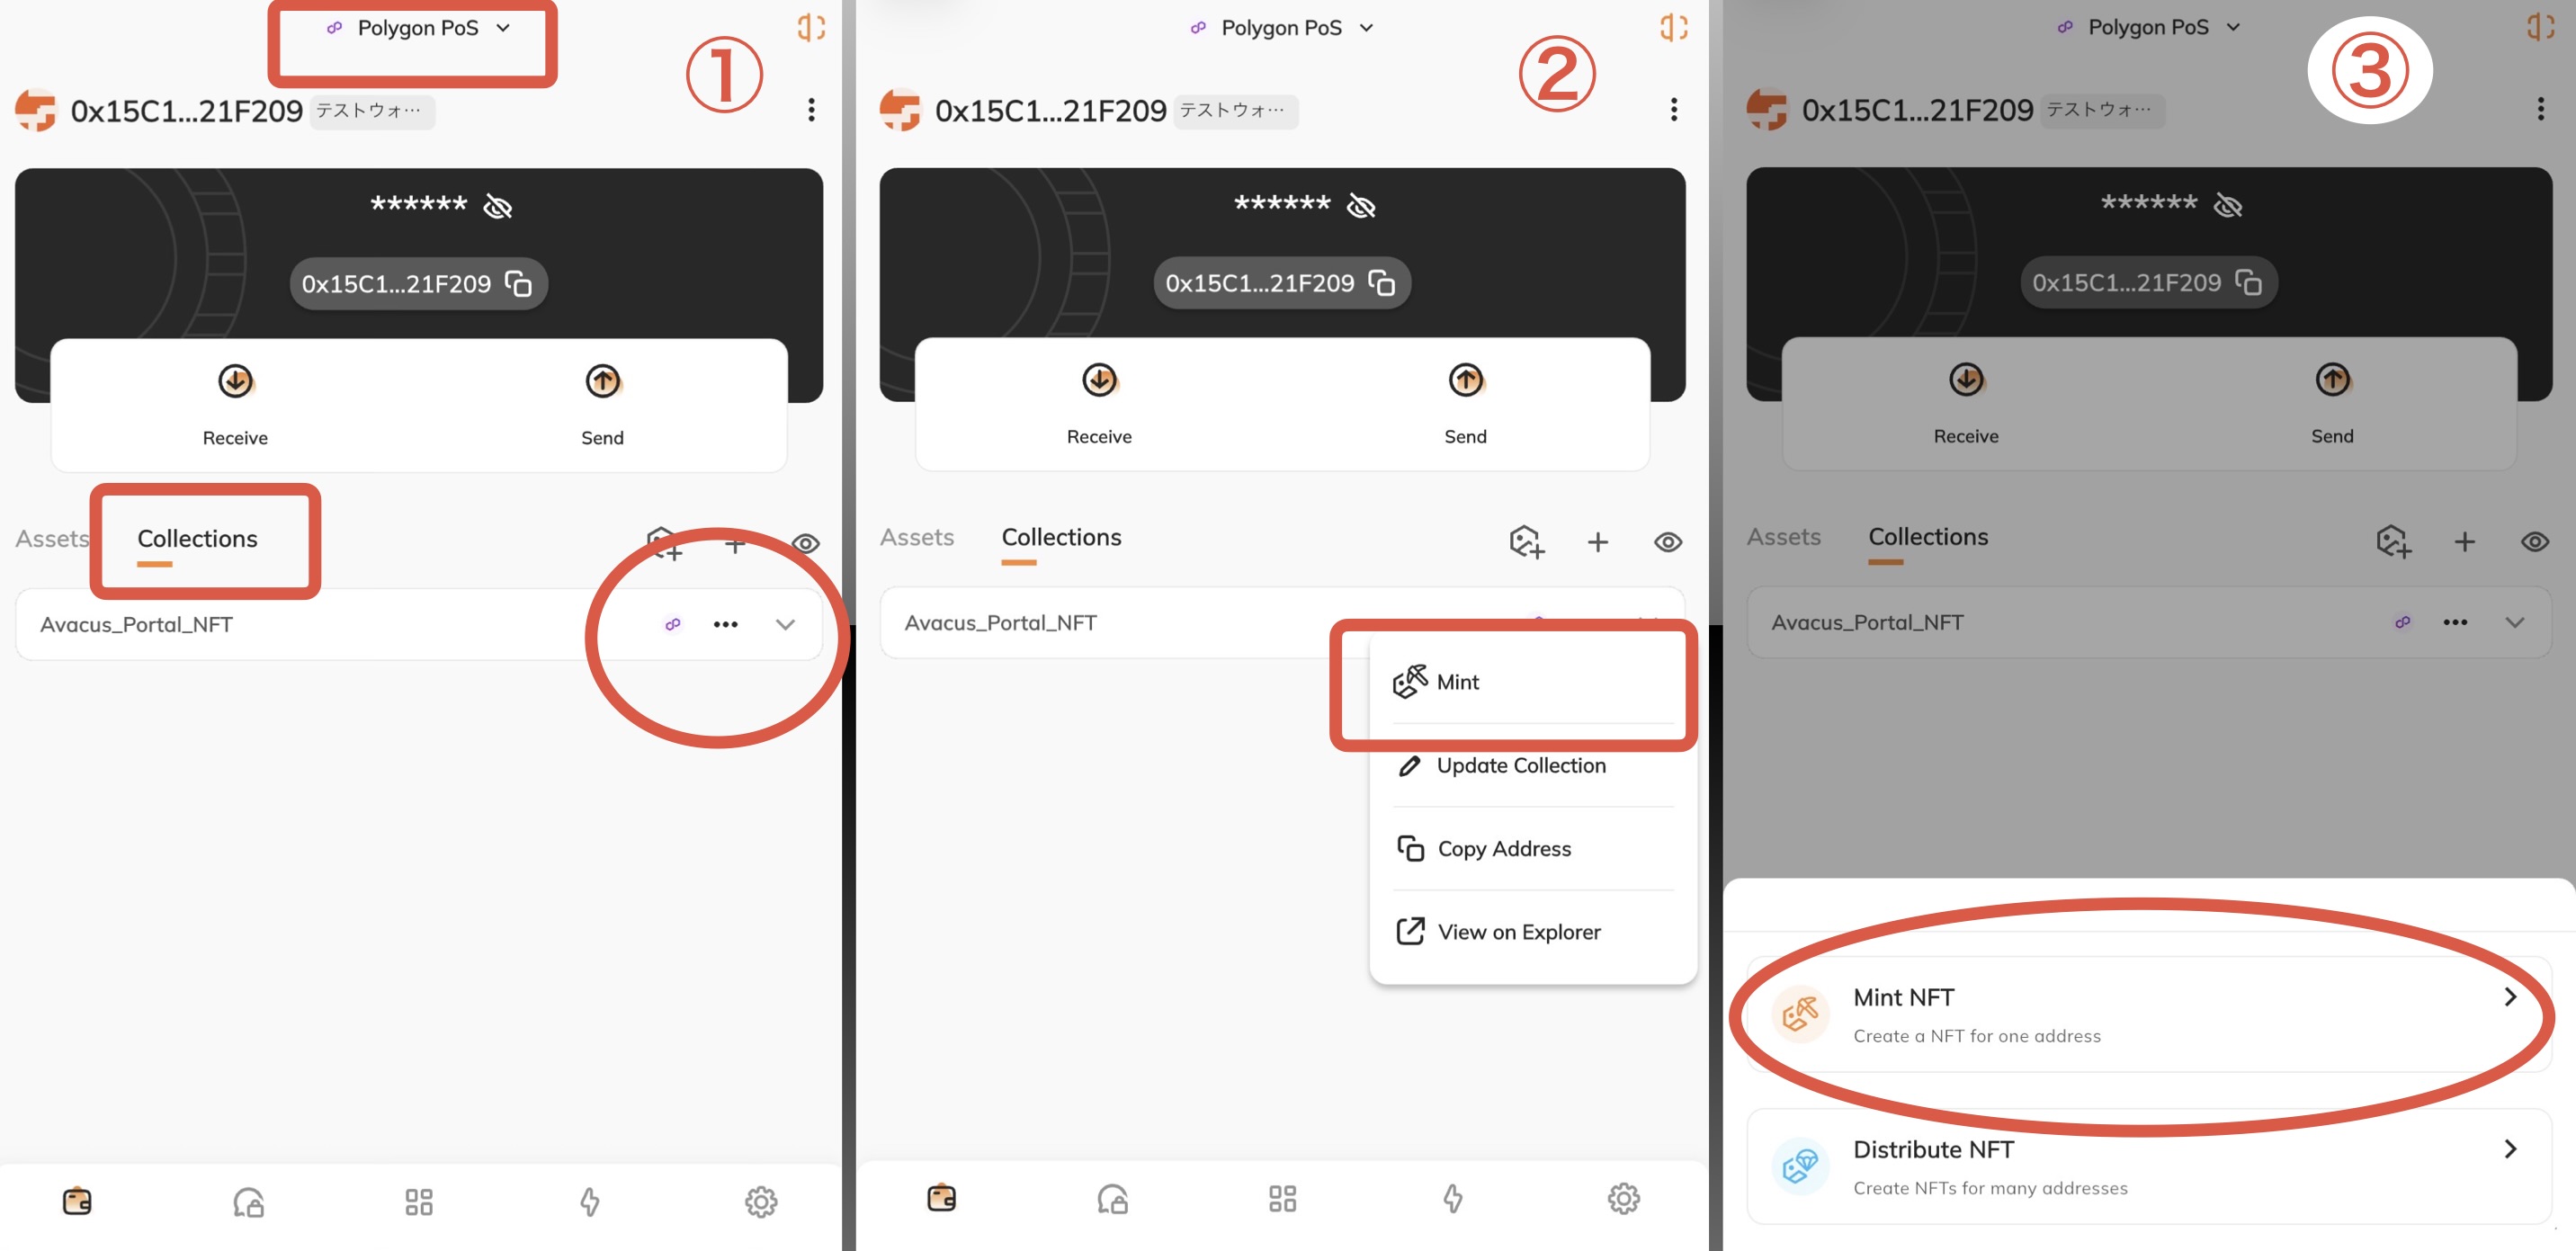
Select the Collections tab, then select the three-dot menu on the NFT you issued (Image ①). If the three-dot menu is greyed out and can't be selected, try swiping down on the home screen to refresh it.
Next, select "Mint" from the menu (Image ②).
You can choose to mint to a single address or to multiple addresses (Image ③). In this article, we'll mint to a single address.
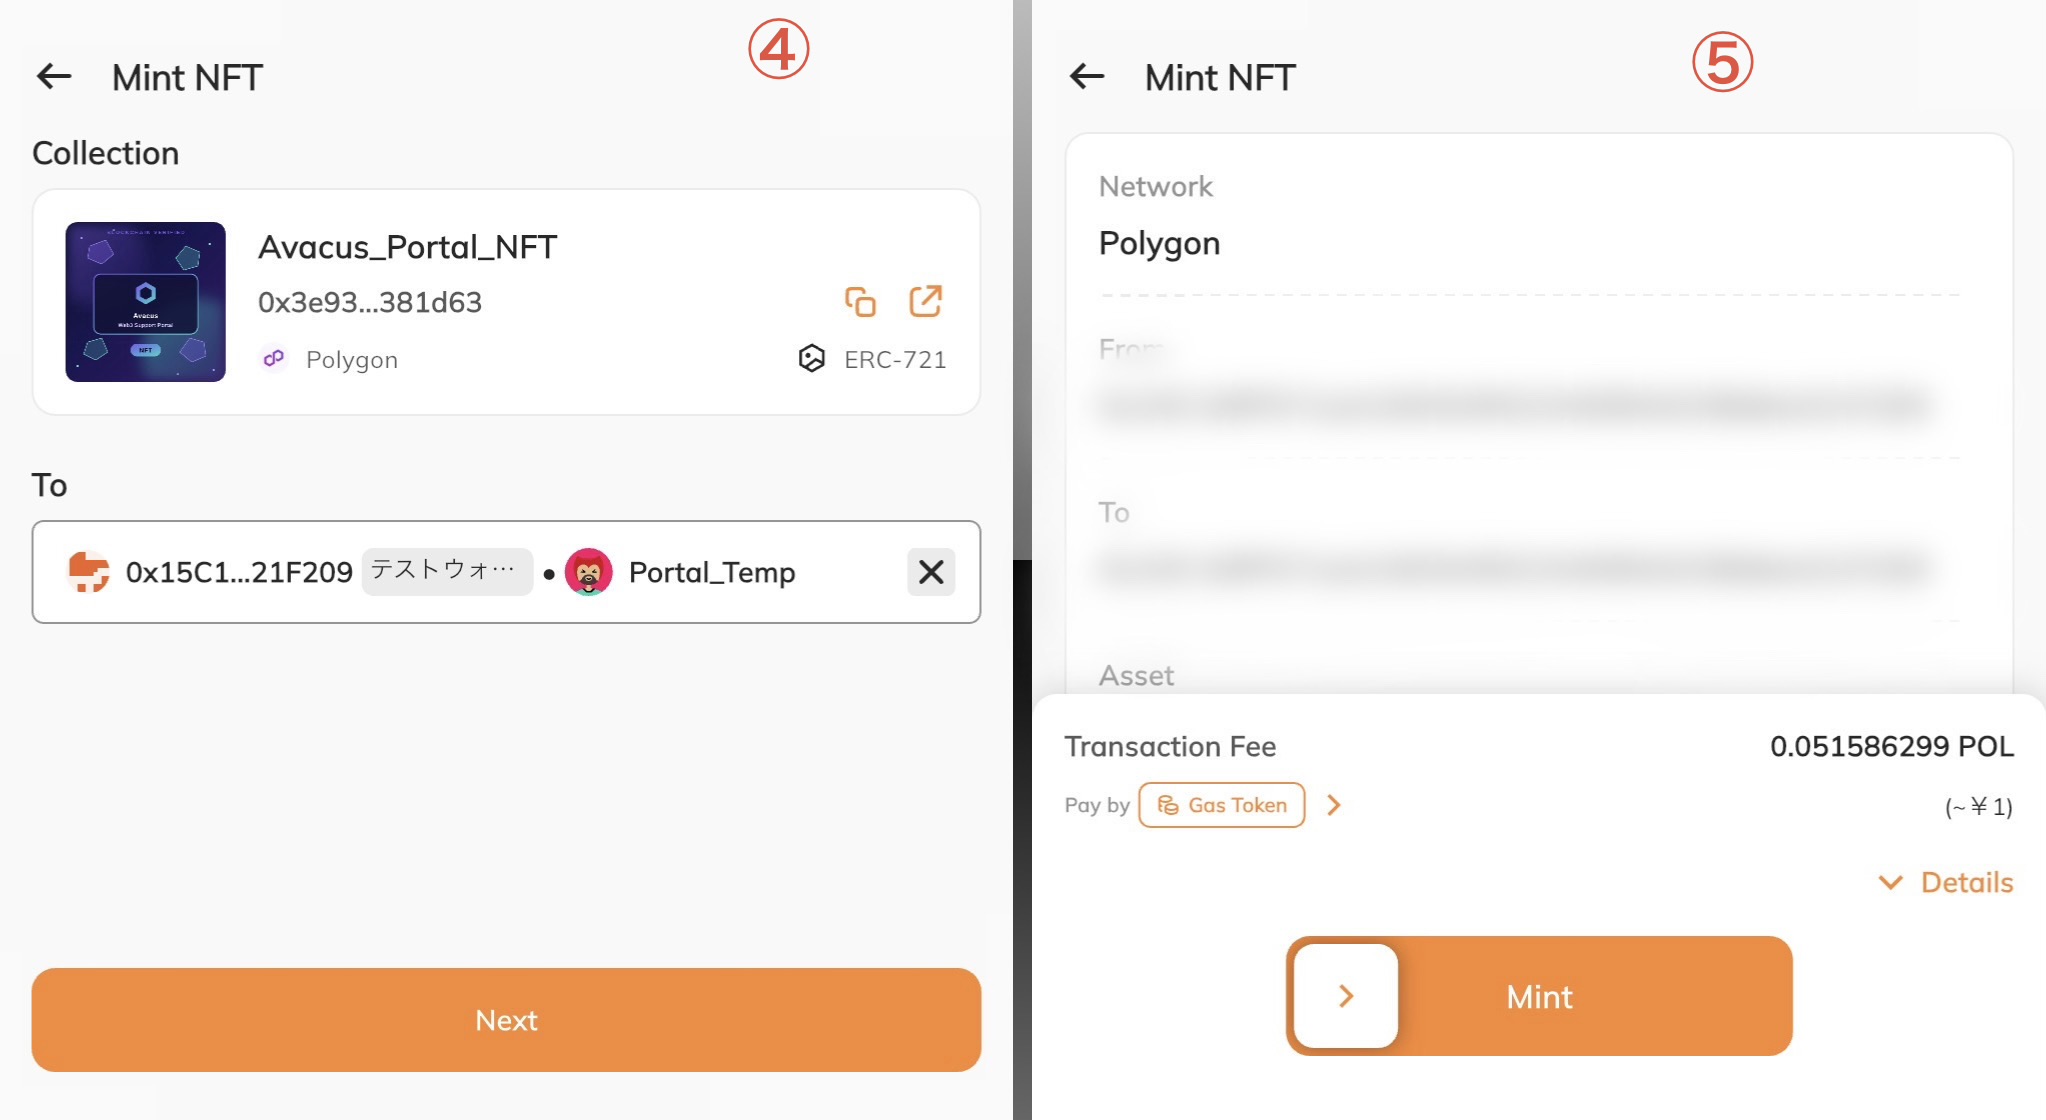
On the next screen (Image ④), you can review the NFT you're minting and enter a recipient address. Here, we'll select our own address from "My Account" to mint to.
This is the final confirmation screen for minting (Image ⑤). Check that the recipient address is correct, adjust the gas fee if needed, then slide the bar.
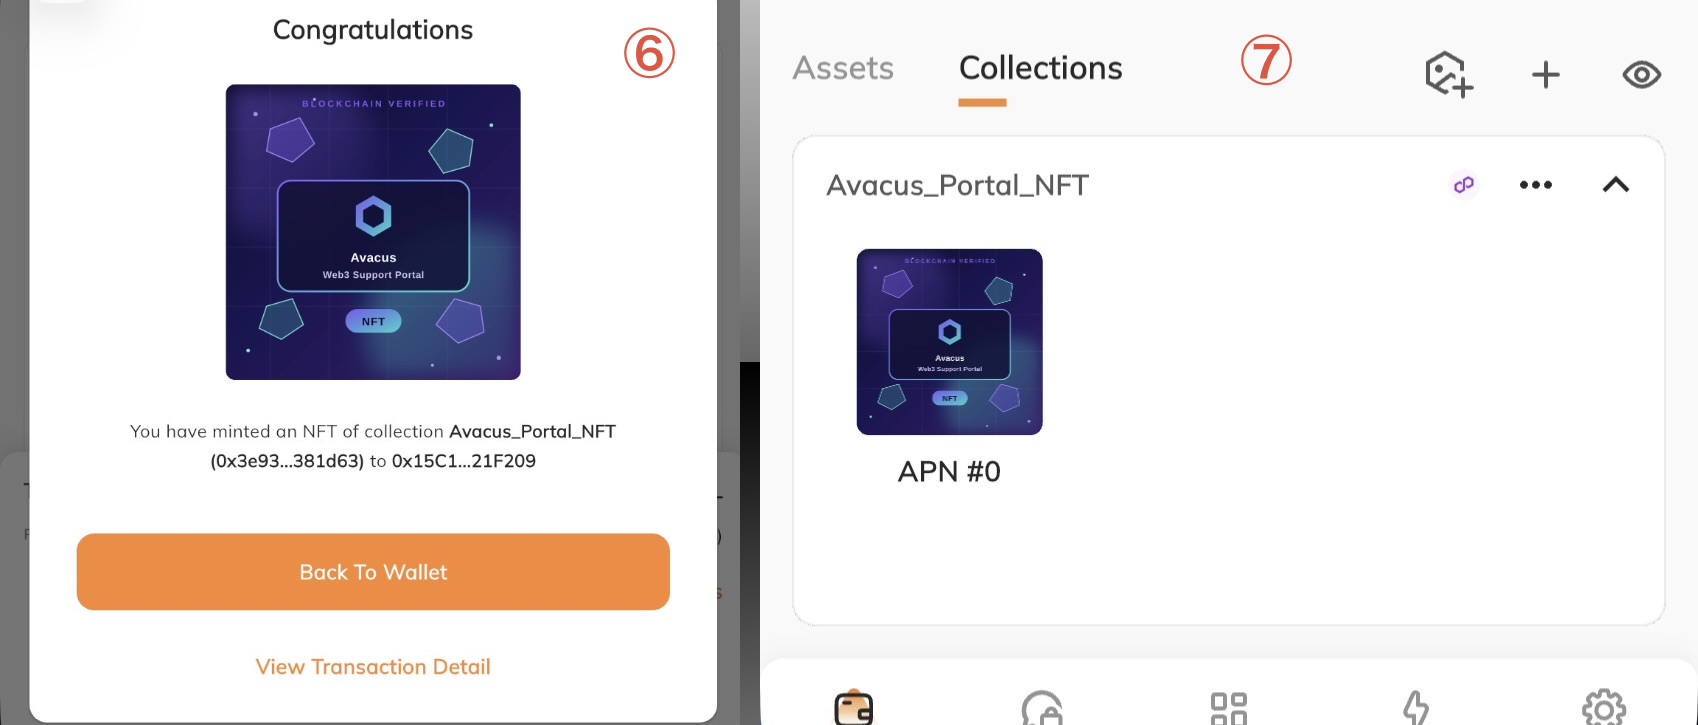 After sliding, the transaction is approved and minting is complete (Image ⑥).
Selecting "Back to Wallet" will show the NFT's image in the Collections Tab, confirming the mint was successful (Image ⑦).