
The Avacus app lets you create and issue NFTs on the blockchain. Once issued, you can distribute them to friends and your community, or sell them.
Avacus distinguishes between "issuing" an NFT collection and "minting" — distributing NFTs from that collection. This article walks you through the steps to issue a collection.
How to Issue an NFT
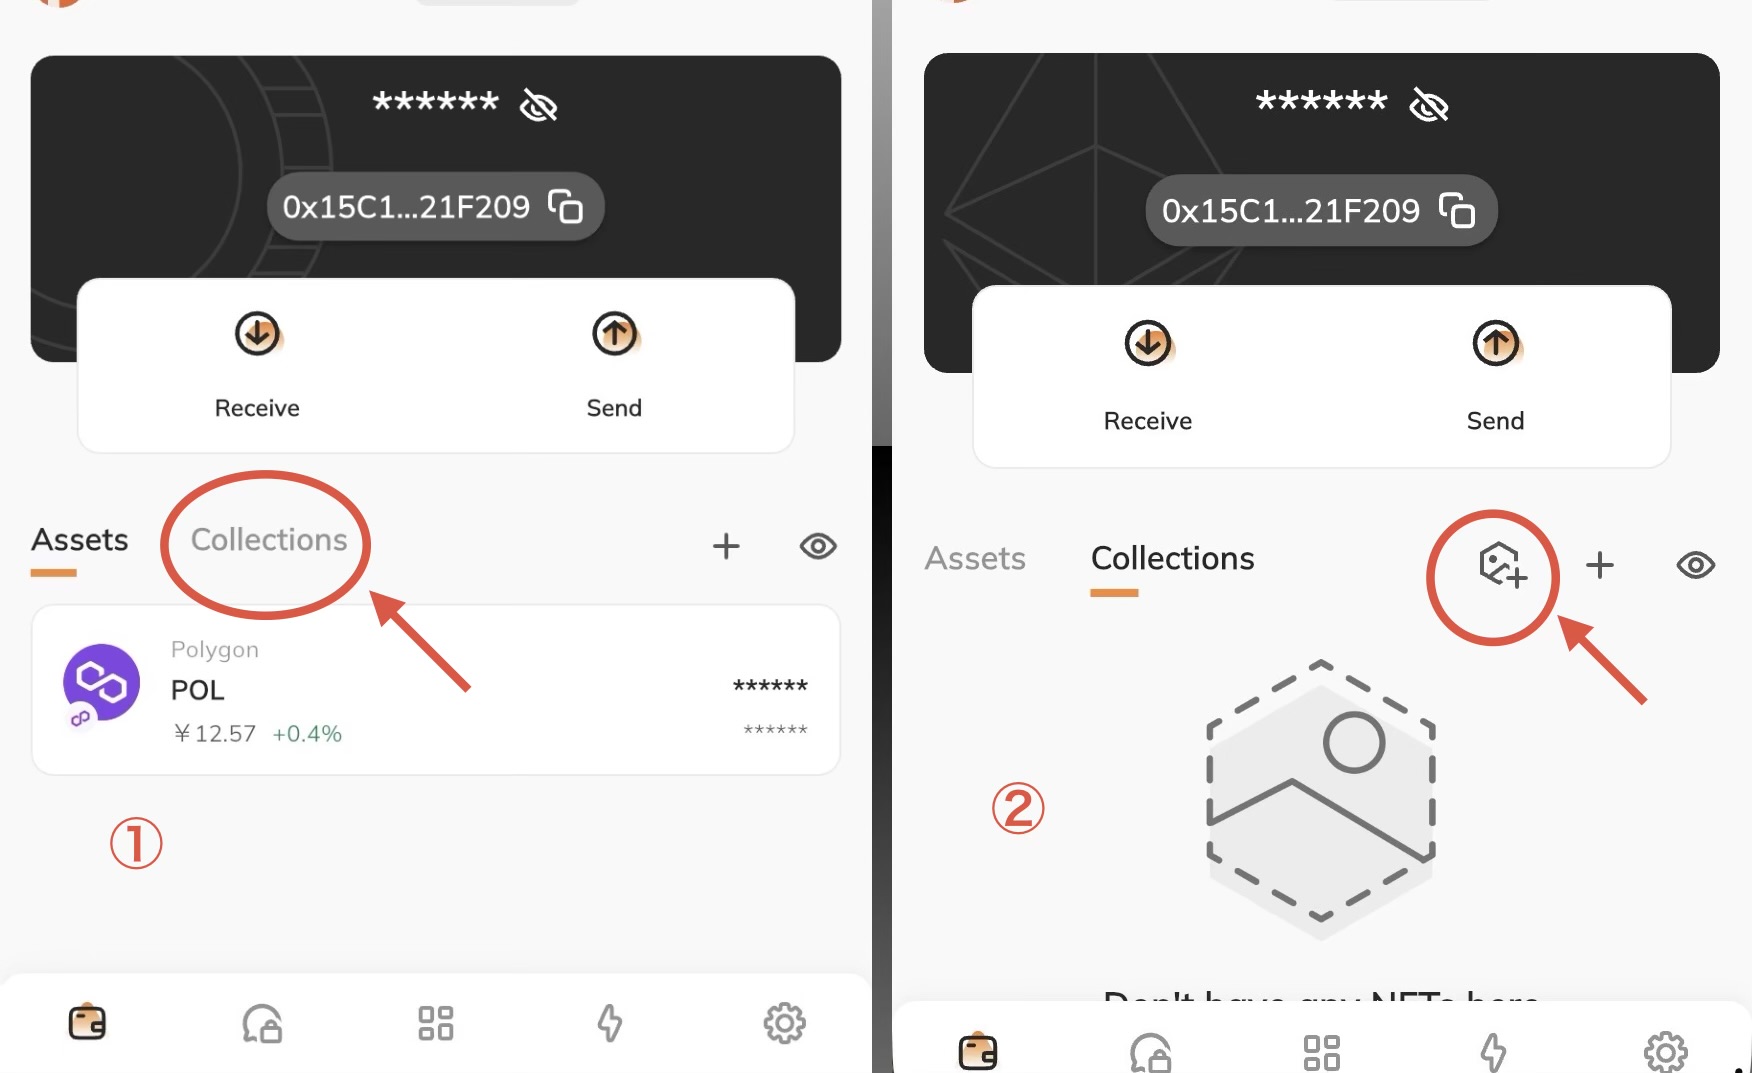
On the Avacus app's home screen, select the "Collections" tab (Image ①).
Next, tap the leftmost of the three icons on the right (Image ②) to go to the NFT collection issuance screen.
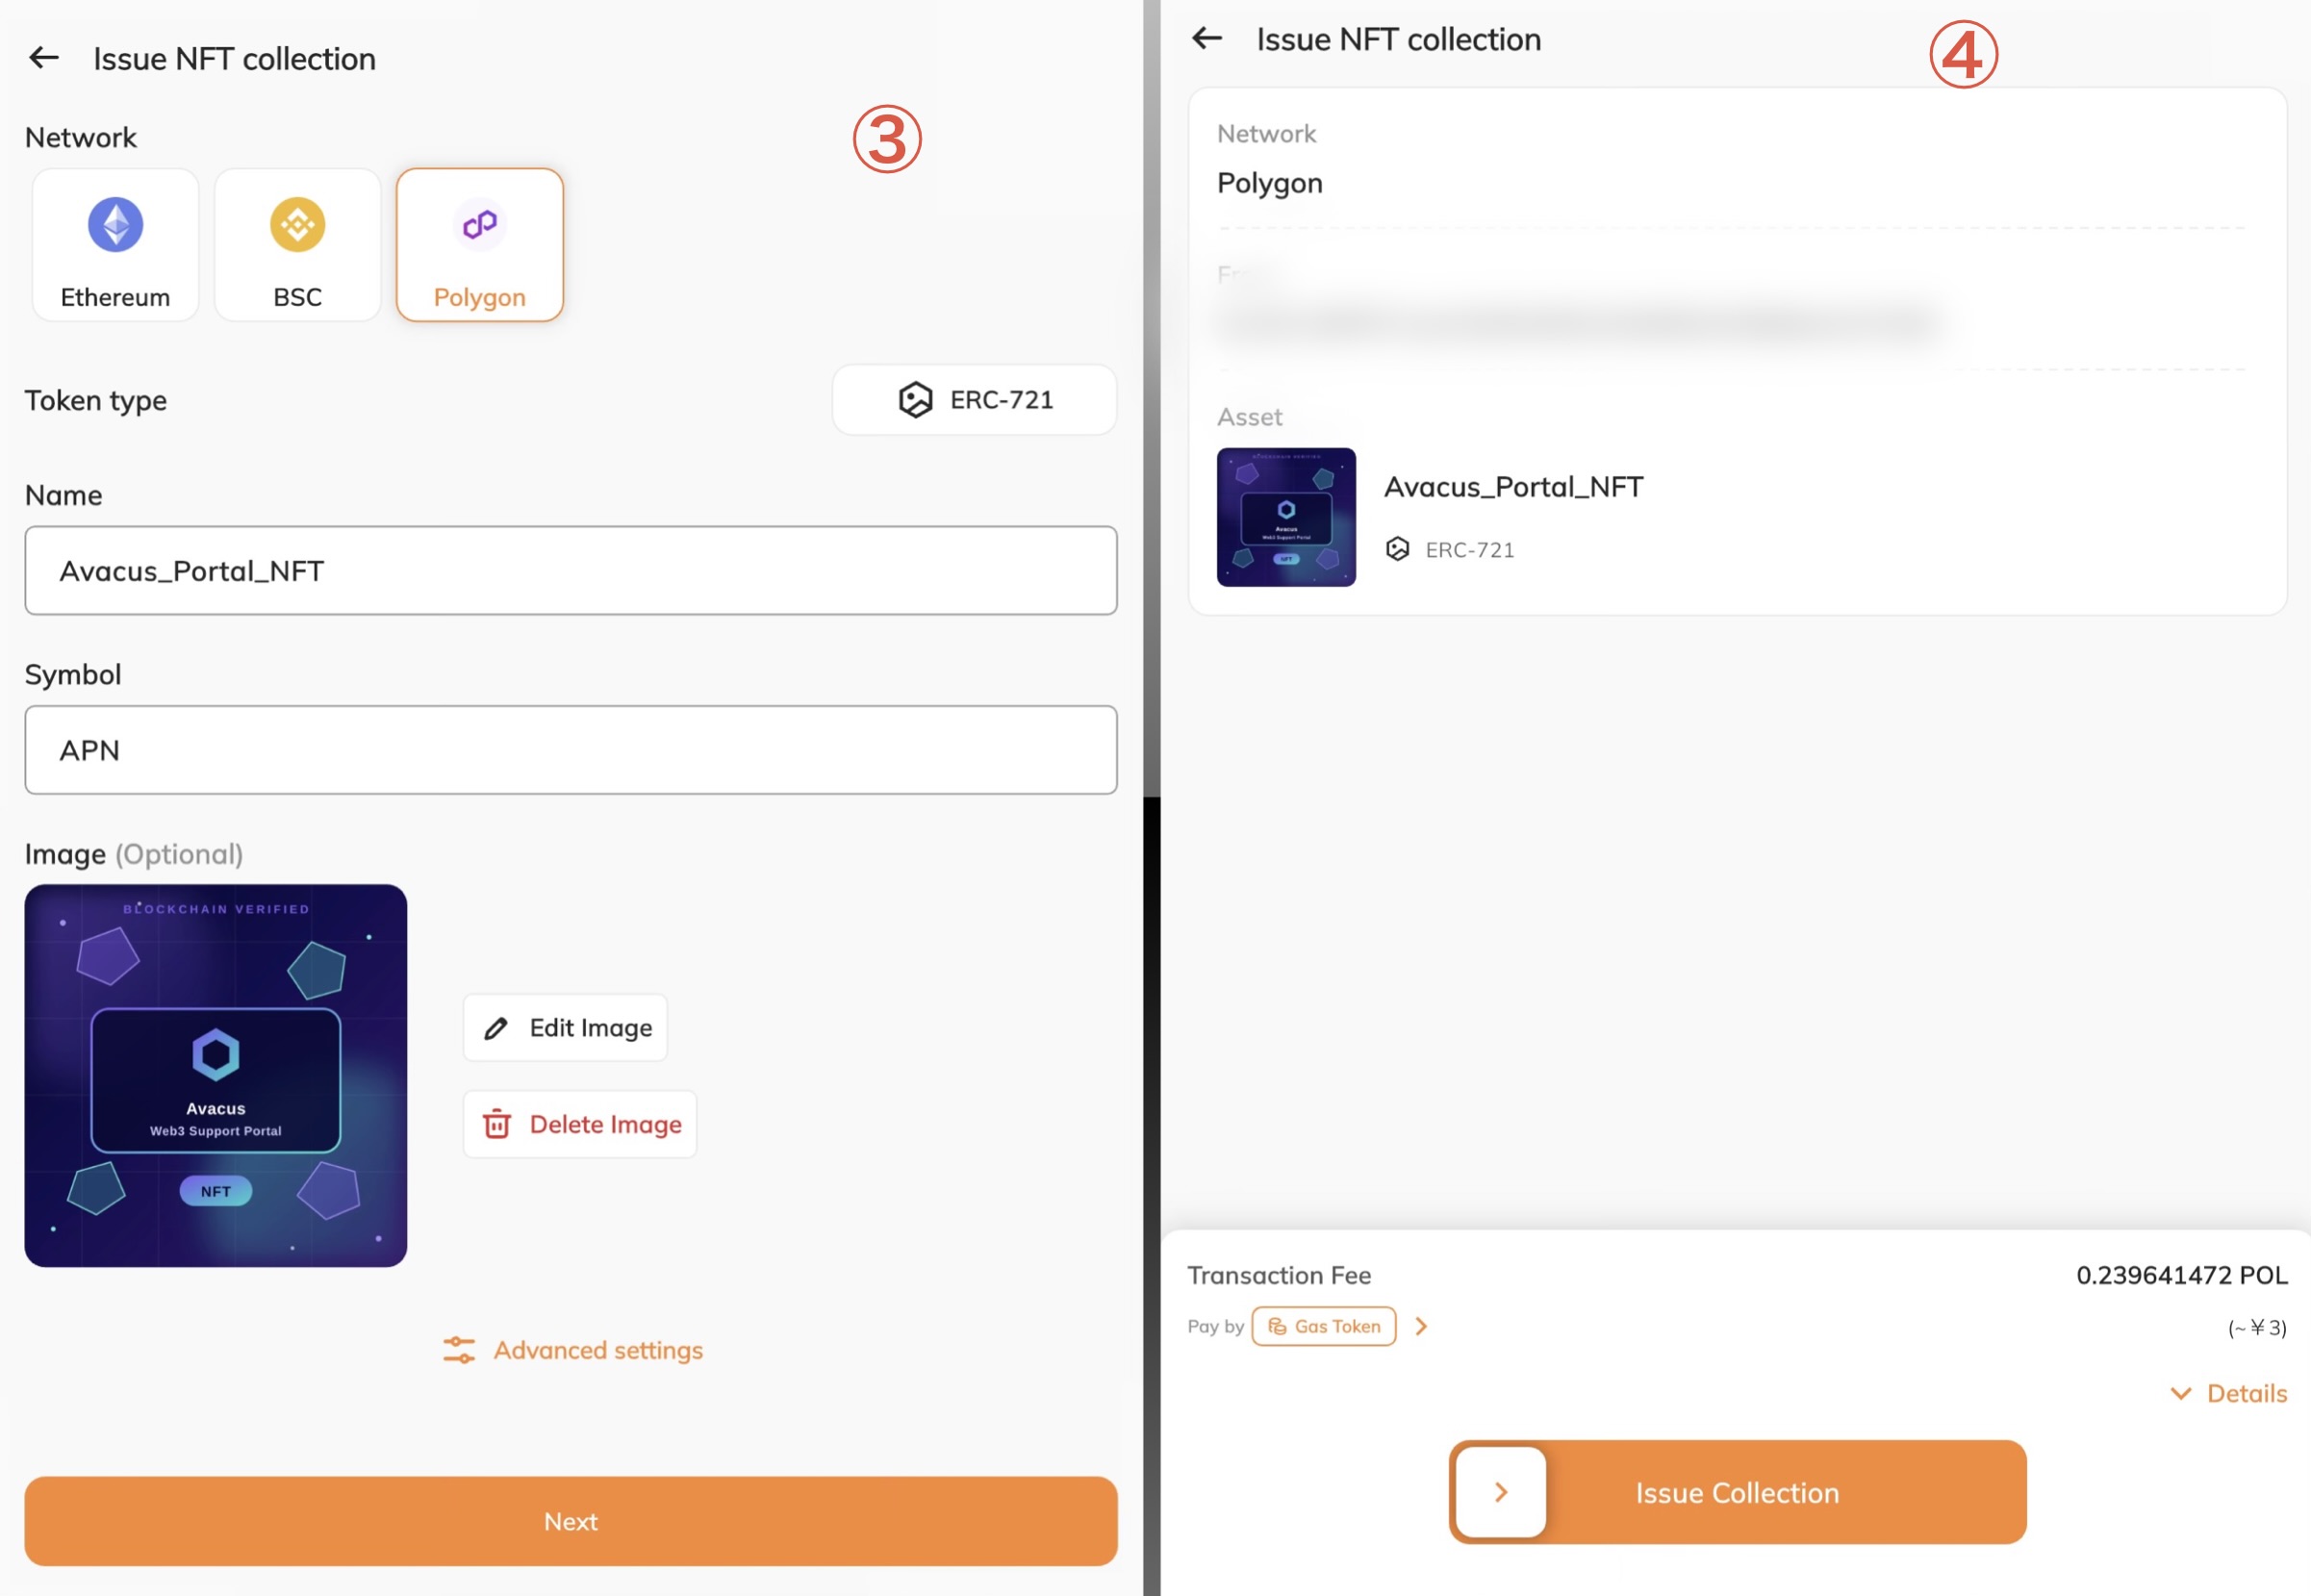 Image ③ is the NFT collection issuance screen. You can set the following:
・Network (Ethereum, BNB Smart Chain, Polygon)
・Name
・Symbol
・Add an image (JPG, PNG, GIF, 512×512px or larger)
What Are "Name" and "Symbol"?
The "name" is a free-form label for the NFT collection as a whole. You can set anything you like, such as "XX Community Pass."
The "symbol" is a short abbreviation used to identify the collection, similar to a stock ticker. It's typically set using a few alphanumeric characters.
In advanced settings, you can also add the following:
・Description (optional)
・Transferable toggle
Once you've finished configuring these settings, select "Next."
Image ④ is the final confirmation screen. Check the network and gas fee, then tap "Issue Collection." On the transaction approval screen, slide the bar to approve the transaction, and your NFT collection will be issued.
After issuing, it takes a little time for the server to process the NFT's metadata (such as the image and name).
After a few minutes, try swiping down on the Collection tab to refresh the home screen. Once you're able to select the three-dot menu on your issued NFT, you'll be able to view its details from your wallet and mint it.
Related article: Minting an NFT