
In the Avacus app, networks that are not shown by default can also be displayed and used by adding them as custom networks.
How to Add a Custom Network
In this guide, we will use the Base network as an example.
First, open the app settings from the navigation bar at the bottom of the app screen.
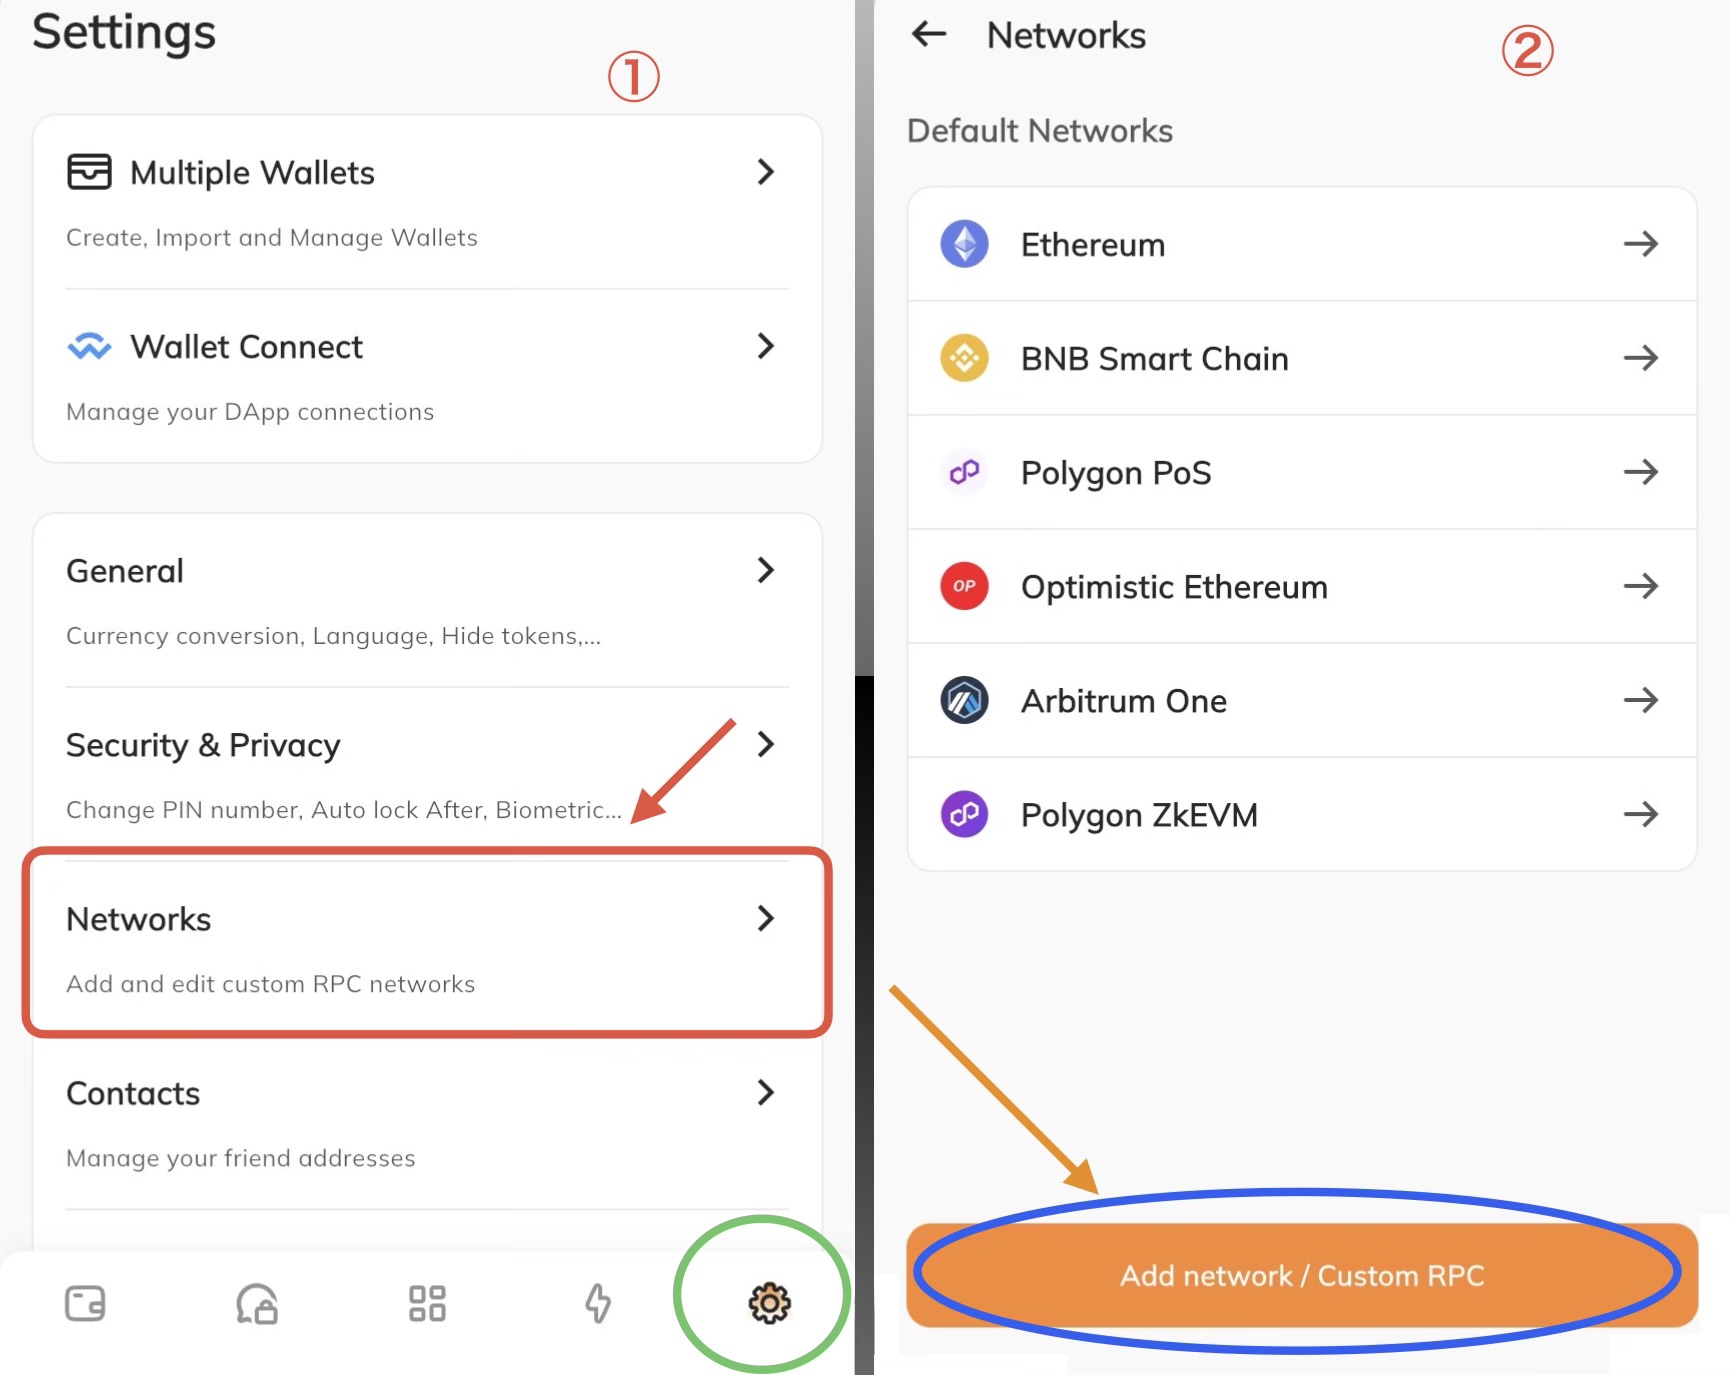
On the app settings screen shown in Image ①, select Network.
On the Network screen shown in Image ②, select "Add Network/Custom RPC" at the bottom.
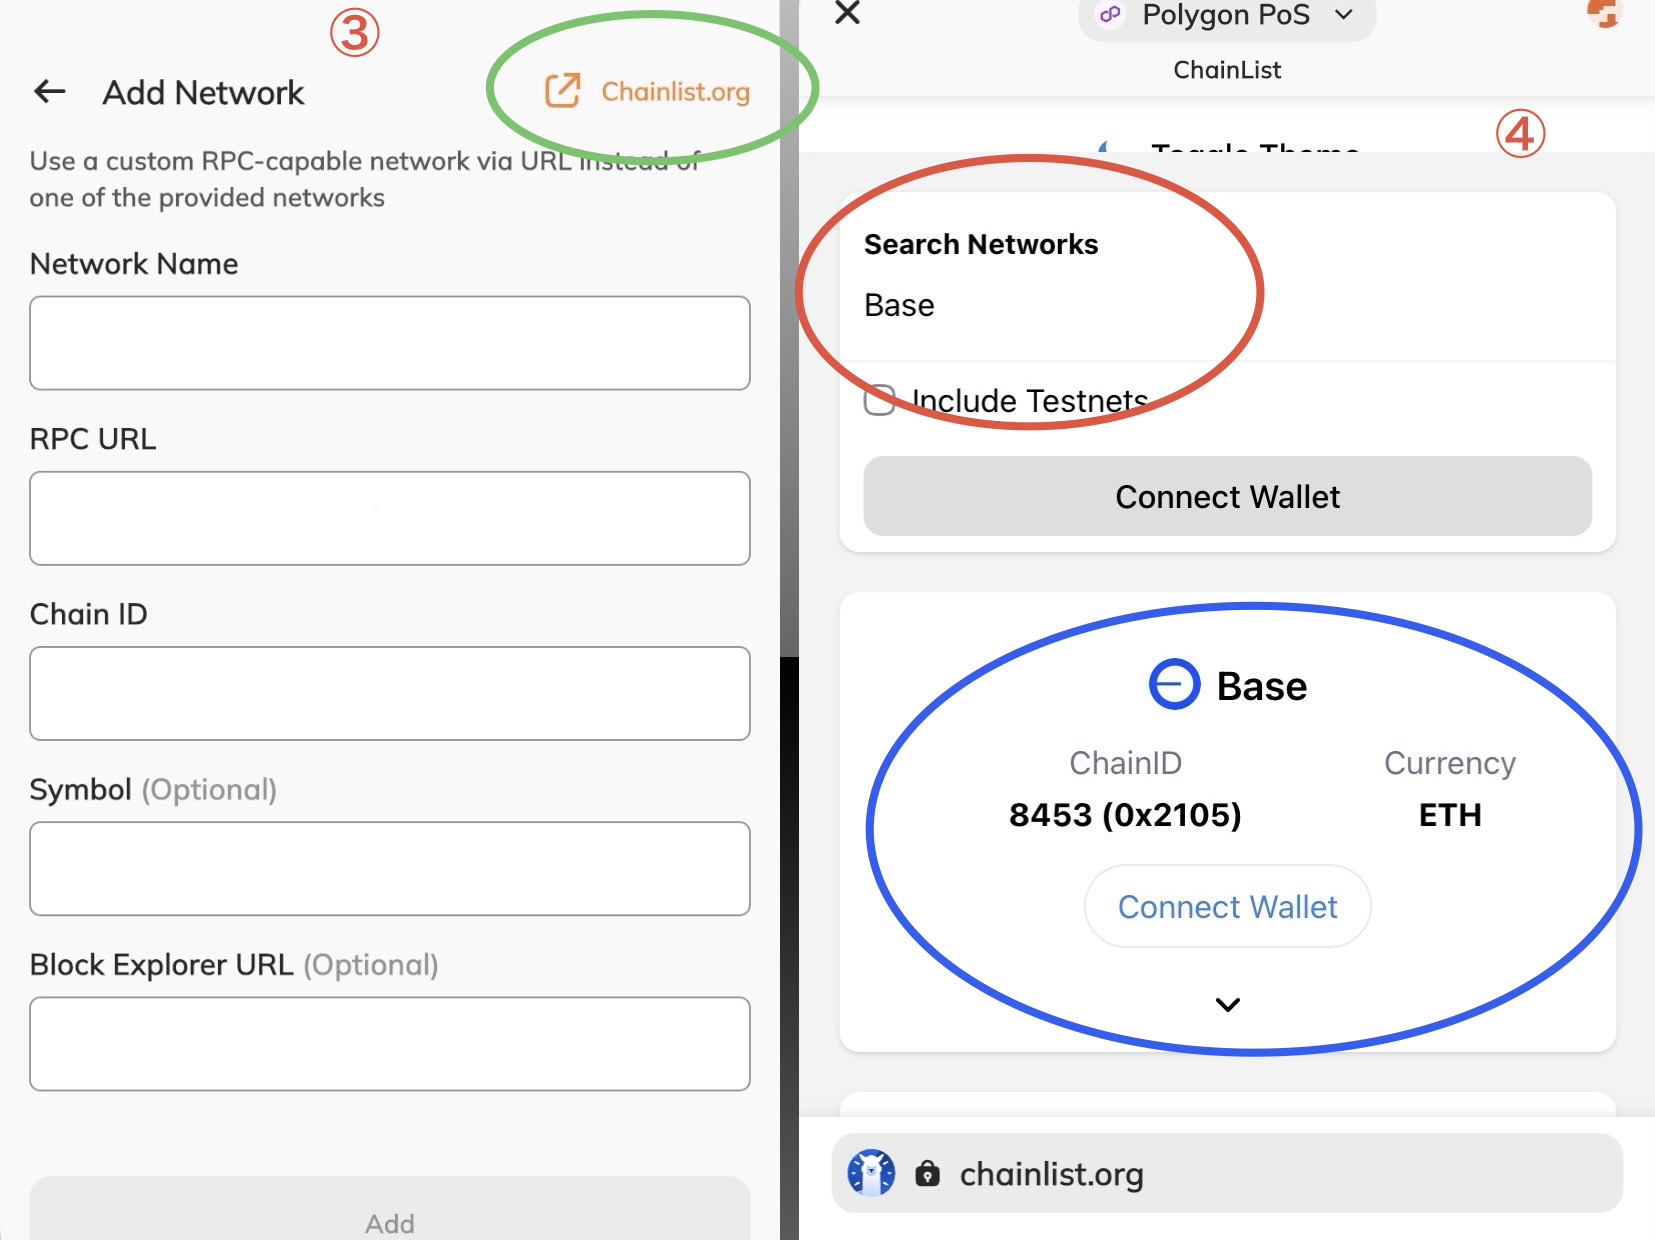
On the screen shown in Image ③, tap "Chainlist.org" in the upper-right corner.
In Image ④, enter "Base" in the "Search Networks" search field marked by the red circle.
The Base network will then appear in the search results, marked by the blue circle. Tap "Connect Wallet" to begin importing the network information into the app.
Once the import is complete, a confirmation asking whether you want to allow the network to be added will appear. Select "Allow." You will also be asked whether you want to switch to the newly added network as the active network for your current wallet.
After adding the network, you can switch between networks by tapping the currently selected network at the top of the wallet screen. For example, you can switch from Base back to Ethereum or to another network you have added.
Avacus does not officially verify or provide support for the operation of individual custom networks. Please keep this in mind when adding and using custom networks.
Related article: Fixing "N/A" Displays Using Chainlist.org